Comprehensive Guide to Sanding Your Wood Products

Woodworking is a delicate art that requires precision, patience, and the right techniques to achieve a flawless finish. One of the critical steps in this process is sanding - a task that can transform a rough, uneven surface into a smooth, ready-to-finish masterpiece.
At Midwest Dowel Works, we understand the importance of this stage in woodworking and are here to guide you through the process, ensuring that your wood products, including dowel rods, plugs, craft and toy parts, and other turnings, receive the perfect finish.
Understanding the Basics of Sanding
Sanding is more than just rubbing sandpaper against wood; it’s a meticulous process that involves several stages, each requiring attention to detail and the right tools. The primary purpose of sanding is to remove imperfections, level surfaces, and prepare the wood for finishing, whether it be staining, painting, or sealing. The choice of sandpaper grit, the technique used, and the amount of pressure applied all play crucial roles in achieving the desired outcome.
Starting with the Right Grit
Sanding should always begin with a coarse grit sandpaper and progress to finer grits. The exact grit to start with depends on the condition of the wood. For rough, unfinished dowel rods, plugs, or other turnings, you might start with a 60 or 80-grit sandpaper. This coarse grit helps to quickly remove any rough spots, mill marks, or other imperfections.
As you move on, you’ll transition to finer grits such as 120, 180, and finally 220 to smooth out the surface and prepare it for finishing. Each successive grit erases the scratches left by the previous, finer, and finer until they are virtually invisible.
Choosing the Right Sanding Tools
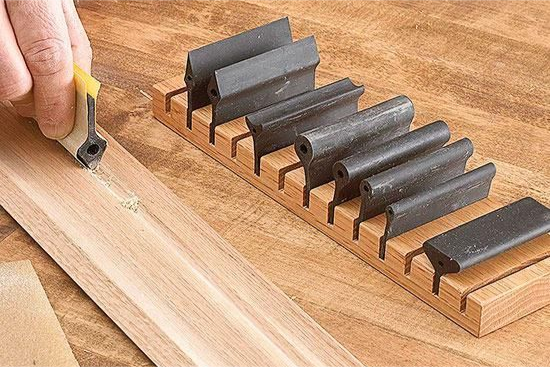
The choice of sanding tools can greatly impact the efficiency and outcome of your work. For dowel rods and other cylindrical shapes, a sanding block or a dowel jig can help maintain an even pressure and ensure that the surface is uniformly sanded. For smaller parts, such as plugs or craft parts, hand-sanding might be necessary to achieve precision.
Midwest Dowel offers a variety of wood products that can benefit from proper sanding. For instance, our dowel rods can be sanded down to a smooth finish, ready for any application, be it furniture making, cabinetry, or crafts. Our wood plugs can be sanded to fit seamlessly into holes, providing a neat and professional appearance. And our range of craft and toy parts can be transformed from raw wood into polished, ready-to-use components for your creative projects.
The Technique Matters
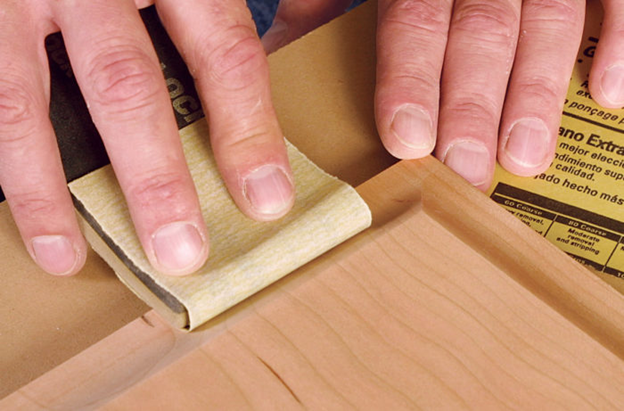
The sanding technique is just as important as the tools and grit used. Always sand in the direction of the wood grain to avoid scratches that are difficult to remove. Apply steady, even pressure, and avoid sanding in one spot for too long to prevent uneven surfaces.
When sanding dowel rods or other cylindrical shapes, it’s important to rotate the wood as you sand, ensuring all sides are evenly sanded. For flat surfaces, use a sanding block to maintain even pressure.

Addressing Common Sanding Challenges
Sanding can present several challenges, particularly when dealing with intricate shapes or hard-to-reach areas. Midwest Dowel’s range of wood products includes various shapes and sizes, each with its unique sanding requirements.
For dowel rods, ensuring an even finish all around can be challenging. Using a dowel jig or a sanding block can help maintain consistent pressure and achieve a uniform finish. For wood plugs, getting a flat surface is crucial for a seamless fit. Place the sandpaper on a flat surface and rub the plug across it in a circular motion, checking regularly for evenness.
Craft and toy parts often have small, intricate details that require precision sanding. In these cases, using a smaller piece of sandpaper or a sanding tool with a fine tip can help reach these areas without damaging the surrounding wood.
Finishing Touches
Once the sanding is complete, it’s time for the finishing touches. Remove any remaining dust with a tack cloth or a damp rag, ensuring the surface is clean before applying any finish. For a silky-smooth finish, you might even consider a final hand-sanding with a very fine grit (320 or higher).
Embrace a Perfect Finish for your Midwest Dowel Products
Sanding is a vital step in woodworking, one that requires the right tools, techniques, and a bit of patience. By following these guidelines, you can ensure that your Midwest Dowel products, from dowel rods to wood plugs and craft parts, receive the perfect finish, ready for whatever application you have in mind. Remember, the time and effort put into sanding will reflect in the quality of the final product, making it a crucial step not to be overlooked.
Happy woodworking!
For more woodworking tips, follow Midwest Dowel on Facebook, Instagram, Twitter, and Pinterest!
Happy with the Midwest Dowel difference? Leave us a five-star review here!
Do you need dowels for your next project? Click here to shop Midwest Dowel today!